
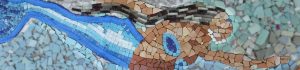
Here again is how she looked as of a few days ago. She has more hair (leftover glass tile from a bathroom project). A line of small seashells creates a necklace and defines the shape of her face. You can see her two arms, one trailing behind and the other reaching out front. All the blue and green tiles are just random; they will be put on the wall one at a time once her body is up. (Please note that she is still on the table in that photo, horizontal.)
I ended up moving her eye back a little, and better defining her nose and chin. You’ll have to wait a few days to see how that looks, because here is how she looks as I write this in the late afternoon:
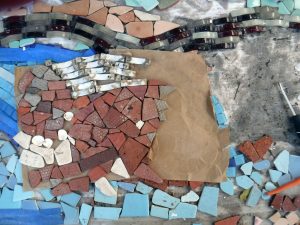
I painted one side of this special brown mosaic transfer paper (ordered from Mosaic Art Supply in the USA way back in May 2017) and spread it carefully over her face and torso. When it’s dry, I will (theoretically) be able to carefully lift the pages with the tiles intact, butter the back of the tiles with mortar, and place them up on the wall. The next day I’ll soak the paper with a hose; the water will melt the glue (Resistol 850 Adhesivo Blanco Escolar, Mexico’s equivalent of Elmer’s School Glue) and the paper will fall off.
And here is the result of my first lesson in mounting tiles.
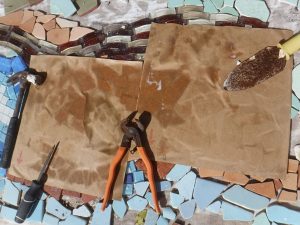
We started at the bottom left corner, far away from where Sirena will be. Master albanil Reynaldo mixed the mortar and applied some to the wall (you can see the mortar with the lines from the notched trowel).
I picked it up from there, spreading some mortar on each tile and pressing it in place. I learned fast to wear a glove when using the mortar; my index finger is still feeling a bit irritated from rubbing that stuff.
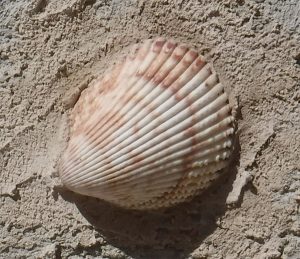 We’ve got a pile of shells what we want to work into the “rising sand ocean floor” on the right side of the mosaic, so Reynaldo showed me how to stick one up. It’s the ONLY thing over there and will probably be lonely for quite a while.
A few hours later…
The glue has dried, and I carefully flipped the first sheet of paper over. It seems to have worked really well!
 Just a few tiles and shells didn’t come over, and it will be very easy to know where they go. In this photo you can see the back of the tiles (her face faces to the left), and the empty area on the right where the tiles used to be.
Now it is late afternoon. No more will be done today, as we wait and see how well the adhesive mortar is going to work.
NEXT PAGE: 22 Jan 2018