
On 30 April 2017, I downloaded some mermaid images off the Web. I’m calling that the official start date of the La Sirena project.
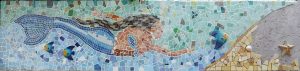
2:30 PM on 3 July 2018, 429 days later, the mosaic is officially completed. Here she is!

LOOKING BACK
There was an initial flurry of work in May and June of last year. I did the design, printed it out full-size and spread it out on three long tables. All of Sirena was laid out on top of the design, and I even put up a few tiles (the ones in the far lower left corner). Then we started traveling and did a lot of construction work on the house, so the next six months the project was on hiatus. It all restarted in January of this year, and this blog went online soon after.
La Sirena is a bit larger than planned; about 30 inches high (it varies since there is no such thing as a straight line in Mexican construction) and 13’10” long. A fast calculation says there are more than 2,000 tiles up there (maybe I’ll count them one day).
TODAY’S WORK
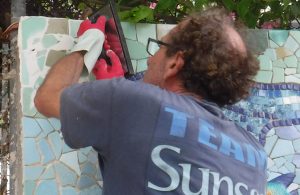
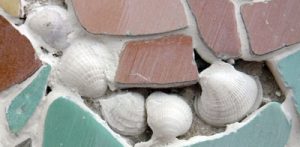
Today started with grouting all the seafloor. This was much harder than the ocean end of the project, because of all the shells. I could not use the grout float on much of the area without getting grout all over them, so I ended up using a ScotchBrite sponge for a lot of it.
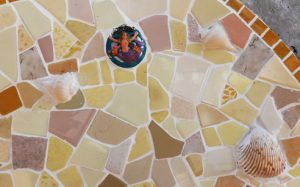
This photo shows what I mean; the shells were about a foot apart or less. You can also see the little “surprise” I mentioned on the Last Tile post; I inserted a mermaid pendant which was made and given to us a few years ago by our friend and mermaid enthusiast Pat Scott. (Thanks, Pat!)
After grouting the seafloor, I got to work with the Grouting Bag filling in the crevices that I couldn’t get at with the float. The bag is a large version of a cake decorator’s frosting bag and works the same way.
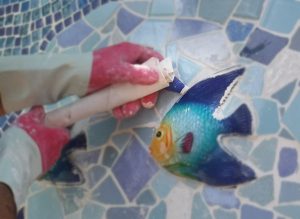
In this photo you can see the blue nozzle at the end of the rolled-up bag. I’m squeezing the grout into the empty spaces around the fish.
I’m glad I only mixed up a little grout for my first try at this. The bag was way too big and so was the nozzle.
Over lunch I looked on the Web for some clues on how to improve the process. (Note to self: do this before you start something new!) I learned that these bags really aren’t made with mosaics in mind; they’re for things like stone walls that still have big gaps but aren’t suitable for the grout float.
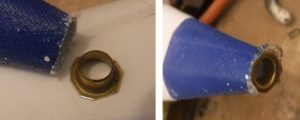 I looked around for a way to make the hole smaller, and came up with a brass grommet. Glued it in with hot glue and crossed my fingers that it wouldn’t be pushed out by the grout.
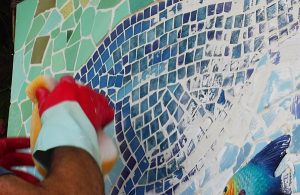
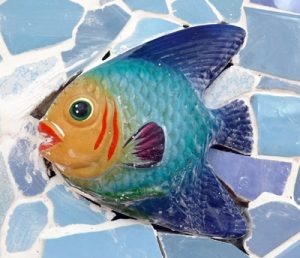
It worked! That and cutting the bag down to about 2/3 it’s original size (so it was much easier to handle) made the rest of the detail work go very well. There was a LOT of it: the pottery fish, Sirena’s shell necklace, belt and bracelets; around her hair, and around all those shells and the starfish.
And after the detail grouting was done, there was a lot of scrubbing to do. Seems like excess grout was everywhere, and some of it was pretty tough to get off. I’ll probably be seeing wayward bits for months; I’ll scrape them if they bother me. (It’s amazing what you don’t see if you’re not really looking for it.)
 So that’s it! By far the biggest art project I’ve ever done; one of the biggest projects of ANY kind, in fact.
Which brings me to the next big question: What am I going to do tomorrow??
Next page: Nope, we’re done!
(Unless I do a “lessons Learned” page, but I’ll think about that first.)
 After the scraping and cleaning (I use the scrubby side of a ScotchBrite pad), I brushed the varnish onto the unglazed tiles. SO here is how the seafloor looks as of 2:00 PM today, all ready for grouting!
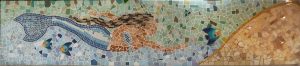
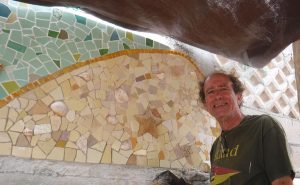 At about 1:30 this afternoon, I put up the very last tile in this project. Sp took this photo to mark the occasion.
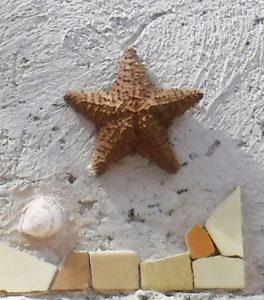 First task was to decide how to END this thing! Up until this week I had the far end of the sea floor marked with a couple of vertical-straight-edge tiles (photo), but that just would not look good when we decide what to do with the ugly cinderblock wall to the right.
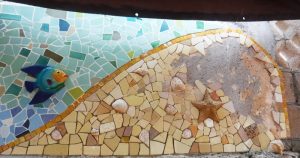

 Here’s how I started. After mixing maybe 1/3 of the 5kg bag; I’m using the float to spread the grout over the tile, pressing it into the cracks.
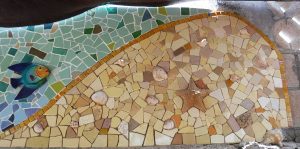
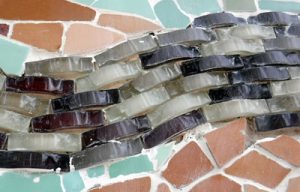
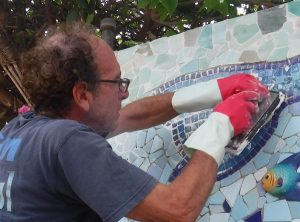 But the good (great, really) news is that instead of the grout bringing out all my irregularities in thickness and spacing between the tiles, it ended up masking nearly all of them! Even the glass tiles, many of which have no gap between them at all,ended up with a very nice white grout line around them.
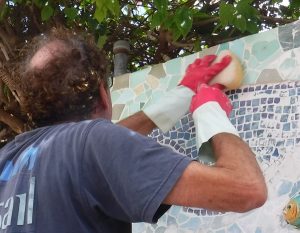
 and the seashell bracelets and necklace have their own issues. They are buried way to deep for me to grout around them. I think the best thing to do, since I have an unlimited supply of shells, is to just glue a near-identical shell right to the top of each one. That should bring them up to the level of the tiles, and then I can grout around them.
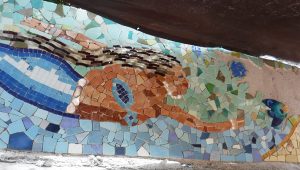
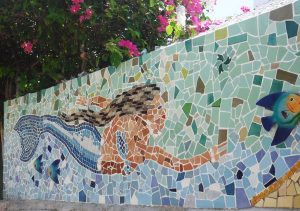 SO, Wow… this grouting day went spectularly well; far better than I ever thought it would. I can finally say: she looks GREAT. Here’s one more look, from the right end of the wall:
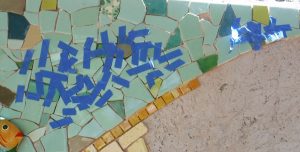 TASK 1: Finish fitting and taping up tiles. This was a really long process as I’ve typed before, with many tiles taking 15-20 minutes to fit. But I got it done before lunch, and here’s the photo.
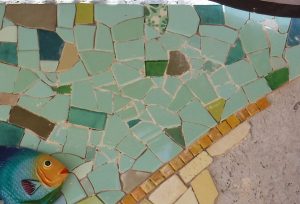 TASK 2: Cement them in. I’m back to the Bexel “Solucion Total” cement, and I’ve decided I really don’t like it as much. But I got them up in good shape (assuming they STAY up).
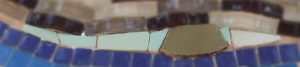 Well, I thought so anyway. Because when I stepped back, I realized there were still a few little gaps to be filled; irregular-shape places that I figured I’d wait until the right tile showed up. They never did, so another half hour of cut-and grind to do these (under her hair)…
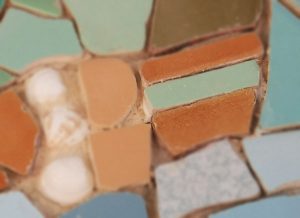 and this green one (between her fingers).
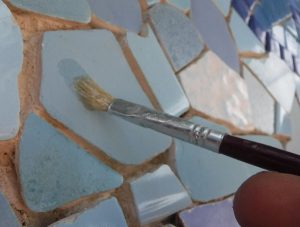


 Here’s the closeup view. You can see there really is a very small space left to fill in with green.
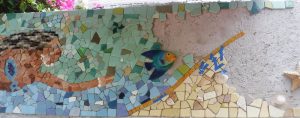 Light at the end of the tunnel?
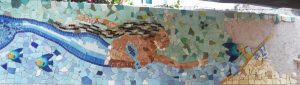
 So the last several days have been the same slow process of finding a tile that almost fits a place, chipping and grinding it, and taping it up. Then once a day, mixing up the cement and sticking them all on the wall. The above photo is the recent work as of 12 Noon today–notice that the entire area above her is now completely filled in!
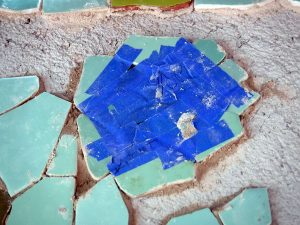 After taping it all together so it could be handled as one piece (just as I did five months ago with Sirena’s body), I cemented it in place as you see here.
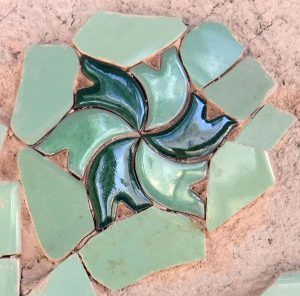 The tape is off and you can see the pattern!
 Back from five weeks in Europe, and there’s some pretty inspirational tile work out there. Portugal in particular is very well known for paving its pedestrian walks and plazas with black and white mosaic tiles, and the Andalusian cities of Cordoba and Sevilla have tile walls and decoration literally every place you look.
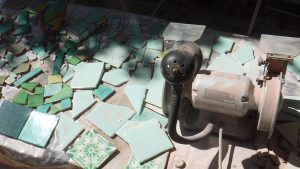 Returning home the first issue to deal with was the same one that existed in April: the lack of enough pale green tiles. So I put a request out on our local expats Facebook group. Unlike my try several months ago (it was blue tile that time), I got several responses! It took a few trips out to the other beach towns, climbing around construction sites or combing piles on the playa, but I now should have more than enough to get this project finished.
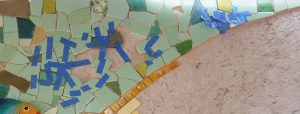
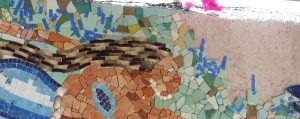 Today was my first day back at work on La Sirena, and the result is here. I’ve selected, cut, grinded (ground?) and taped up about 50 pieces to be cemented on the wall tomorrow morning.