
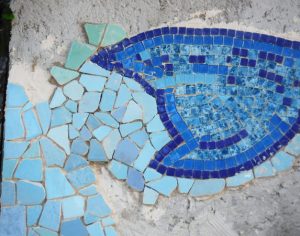
I really am feeling the squeeze on the pastel blue tile. I want to cut as little as possible, to try to use what I have to its best advantage.
As my inventory of tile gets smaller, it is harder and harder to find pieces that fit and mesh with what is already on the wall. Because of that, it’s not practical right now to mix up the cement, spread it out, and then choose and place the tiles. (We keep an eye out for more beach tiles, and others are looking out for us, too.)
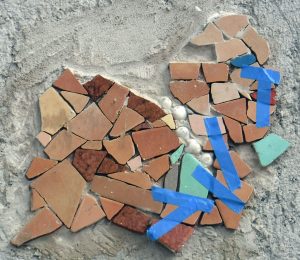
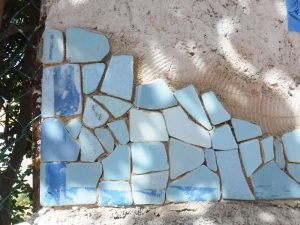
So instead, I’m doing what you can see in this photo:
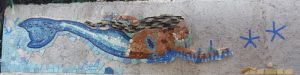
 Every piece of blue masking tape that you see is holding up one or more tiles, which I’ve selected to fit (and hopefully look good in) the space–there’s a total of about 40 up there.
Off to the right in the top photo, the two blue-tape stars show about where our two real starfish will go; they’ll give something for La Sirena to be reaching for and looking at. (Not that starfish actually swim; call it artistic license.)
I’ll place more tiles this way until there’s enough to be able to mix up cement and glue them on. And if I have some left over, I can work on the yellow sand area at the right; nothing very critical there and there is lots of yellow tile!
Next page: 24 March–More background
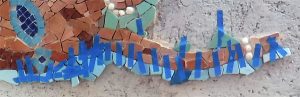
 Several people commented that her right arm (that extends backwards under her hair) looked too short. I agonized over this for a while and decided they were right. You can see a couple of tiles just to the right of her shell bracelet; that extra two inches makes a big difference.
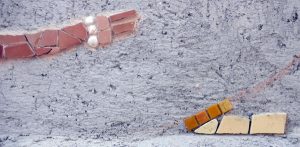
 Then today, I mixed up cement and attached all of those to the wall around her tail. And then–the big unknown–I had to find tiles to fill in the gap between that “outline” row and what was already on the wall, where I’ve been working in from the edges.
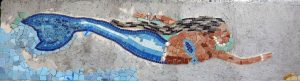
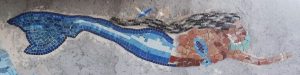 You can see that bit of blue masking tape at the top center of the picture; that is about where her hand will be. So there is very little arm that will show from behind her hair.
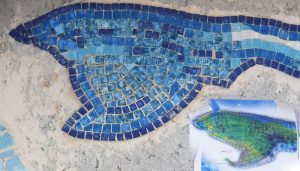 The inset at the lower right is from the original Web photo, and it’s easy to see the different shape. Still, I think the fin looks good, and the curved placement of the tiles gives the right feeling for the shape of the fin.
 Had some adhesive left over, so I went to work on her right arm. The “V” of masking tape in the photo shows the spot on the wall that I’ll aim to finish with her fingers.
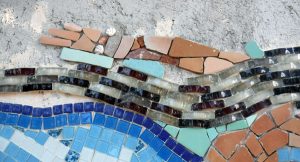
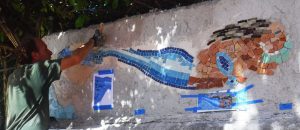 This morning was my first shot at the tailfin, by far the most complex part of the tail. Although the top third is mostly just some more rows of tiles, the rest is a mass of curves and angled or shaped tiles.
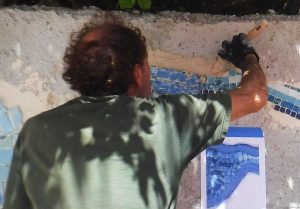 I’m not even using the big rectangular notched trowel for this; I don’t know exactly where the tiles are going so I’d waste too much. So I’m using the small one; just trying to make sure I get enough on.
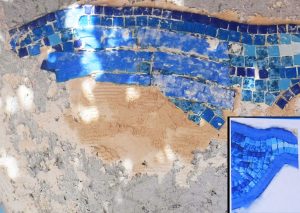
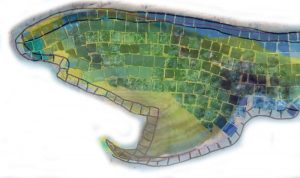 Some Photoshop time to get a better feel for how this is supposed to look. Superimposed the tailfin from the original Website image on to the tiles already on the wall, and then drew in where the outside wall of small dark blue tiles should be.
 I also put up the second batch of tiles that were glued to the squares of brown paper. I would say about 70% of them stuck, excluding all of the blue glass tiles. Fortunately, it was pretty easy to just put those in logically using the No Mas Clavos.
 And that is how she stayed for the last couple of days, until this afternoon. I mixed up a batch of this adhesive, which is supposed to be good for all kinds of tile, including glass.
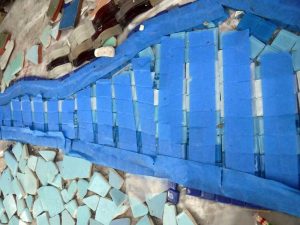 I was working fast to use this stuff. You may remember how I had to pull all the glass tiles off the table because they had stuck to it, put waxed paper under them and stuck masking tape on top to hold them in strips.
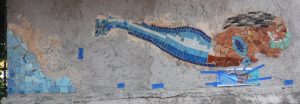
 I’ve mixed a wild-guess amount; about what I saw Reynaldo mix up the other day. Then spread it on the wall using the big rectangular notched trowel.
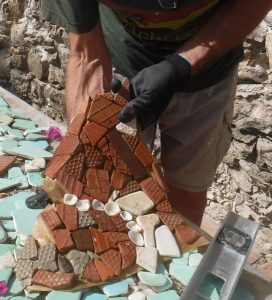 Here she is; ready to go up. I’ve sprayed the back of the tile lightly with water, and just hope the whole thing doesn’t fall apart as I lift it up.
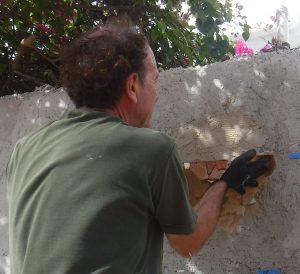 Here we go; kind of unfolding the floppy tiled paper up onto the wall.
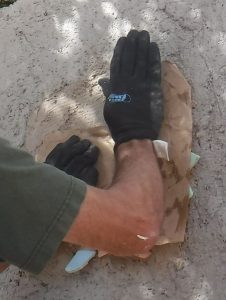 Pushing, pressing, slamming… whatever you want to call it, just trying to get the tile to adhere to the cement pegamento.
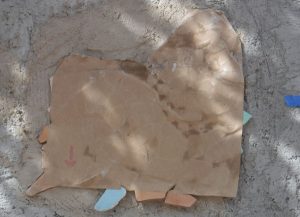 And there it is! Somewhere under there is La Sirena’s face, neck, and part of her upper body.
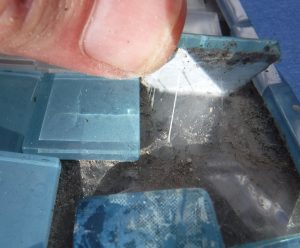 Unfortunately, some of the adhesive stayed on the back of those tiles, and now they are all stuck tightly to the clear plastic sheet that I covered the table with. (Also underneath that sheet is the big paper printed blowup of the design; I’ll show that to you once it’s visible again.)
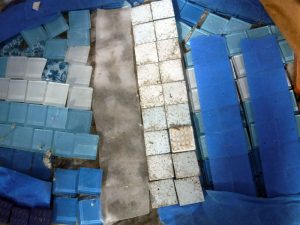 So today I started the tedious process of peeling off every tile (sometimes with my thumb, sometimes it takes a chisel). I’m doing this in pairs of rows, and then covering them with a strip of masking tape to keep them aligned. After that, I’m laying down a little strip of waxed paper, which will hopefully keep them from sticking down again!
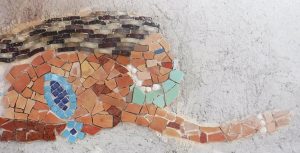
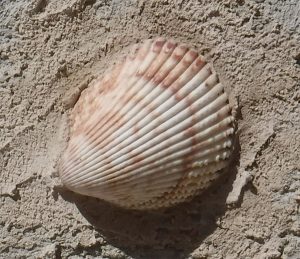 We’ve got a pile of shells what we want to work into the “rising sand ocean floor” on the right side of the mosaic, so Reynaldo showed me how to stick one up. It’s the ONLY thing over there and will probably be lonely for quite a while.
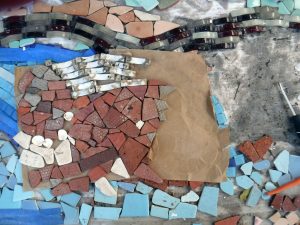 Just a few tiles and shells didn’t come over, and it will be very easy to know where they go. In this photo you can see the back of the tiles (her face faces to the left), and the empty area on the right where the tiles used to be.