Two days and nearly 200 really nice Facebook reactions and comments later, and I’m feeling very good about La Sirena. Her name is “Serena,” which is not very original but is the right word for the way I’ve been pronouncing her name up to now. (“Sirena” gets pronounced see-RAY-nah in español; “Serena” is more se-REY-nah which is better.)
I went back thru the site looking for things that worked and others that didn’t. For those of you thinking of doing something like this yourself, I offer all these helpful hints! Some may apply to you and help you out.
LESSONS LEARNED
This first lesson is WAY down in the process. but it is so important I’m putting it first. I had no idea how dangerous a bench grinder can be. The fact is, I am very lucky that I never took a big chunk out of one of my fingers while using this thing. At first I was not even using gloves, and it was a fortunately-very-small scrape of a knuckle that woke me up. One wrong move and you could be down to bare bone in a split second. I DID wear gloves from then on, and even wrapped the index fingers in ductape to give more protection.
Eye protection–an absolute must. Even with the guards on the grinder, stuff BOUNCES.
And I did this entire project wearing little rubber slip-on loafers. One day a tiny bit of white-hot tile dropped down in one of them. I think the burn is third degree since six weeks later it is still healing. Only the fact that it is so tiny kept this from being serious. It’s very hot here, and long pants would have killed me, but some additional protection would have been a REALLY good idea.
OK, now to a more consecutive list:
Although this was a great experience, I really would advise doing something SMALL first! A 2-foot-square design on plywood would be a great start.
I grabbed lots of images off the Web and pulled them into Photoshop. It was easy to do lots of interations and move things around. (In the original image she is swimming to the left!) Remember that the design had to be driven by the available material, not the other way around.
I ordered the brown mosaic transfer paper from Mosaic Art Supply in the USA way back in May 2017. Although I used it a lot less than I thought I would, it was EXACTLY the right thing to get the critical head and body from the table to the wall. I really want to SHOUT OUT those folks; they stuck with me all the way thru this thing.
My first real problem was with the sticky-back glass tiles, which over the months on the table really stuck themselves HARD and had to be pried off. That’s a warning: don’t let your project sit around for six months like I did.
This was before putting those two transfer-paper areas up on the wall. It is a VERY good thing that I used a level to draw a line on the wall, and then gave my best “This should be horizontal” line on the surface of the paper. If I had not done that, I really would have been in a bind trying to get the sheets up at the right angle. Remember, I could NOT see the tiles–they were under the paper as I pressed it all to the wall.
This stuff is priceless. In Mexico it is Resistol’s No Mas Clavos (“No More Nails”). I think in the USA this would be Liquid Nails, but look around. It has to grab IMMEDIATELY and not come off the wall. It should be thick, and helpful if it’s either white or clear.
On that same page is the first time we see the hair on the wall. This really is a beautiful material; it was left over from our bathroom remodel. In Mexico it comes from Castel and you can see it on this page, but I know it’s imported and available in other countries (probably the USA) as well.
The tailfin really did not come out the shape I had hoped for; I wanted a lot more definition between the two sides of it. The rule here is to STAND BACK MUCH MORE OFTEN and get the big picture. Doing a pencil drawing here would have really helped me, I think.
This page shows the big paper printout on the table; it was finally uncovered enough to see. It was a HUGE help in laying out La Sirena at the beginning. I printed this out using Adobe InDesign; if you do not have software that lets you print something huge over multiple pages, then take your image to a shop that has a big chartplotter.
This page is about not having enough tile. I know this happened because (1) we moved her over a bit, requiring more tile at the left end of her tail, and (2) I was putting up tile closer together than I did on the table (which made it look MUCH better). Moral: start with more than you need!!
As part of that, I also had to change my whole process. I really could not spread adhesive on the wall, and then turn around and try to find tiles to fit. That’s great with a huge inventory of different sizes and shapes; but the fewer you have, the harder it gets, and the more cutting and grinding you khave to do. SO the process became finding/fitting/grinding tiles and taping them up (same page as above), then after doing 30 or so, mixing cement and gluing them all up at once.
Ah, this was interesting, and very Mexican! The top edge of our wall was very uneven, and not level. That meant I had to use large tiles (easy to see in the photos so that sufficent tile would be cemented to the wall. Over the following days I would take whatever cement was left in the bucket after fastening the taped-up tiles, scoop it up in my hand and stuff it gently behind those sticking-up tiles. At this point, it’s a pretty smooth line up there; the tiles are cemented 100% up the back.
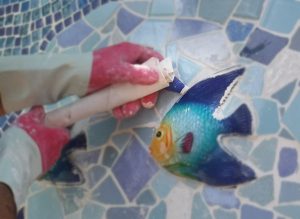
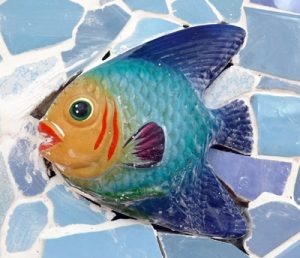
This was fun. I forgot who suggested dropping in some fish, but it was a REALLY good idea. A quick trip to downtown Progreso found some ceramic fish being sold to cruise-ship visitors at ridiculous prices, and (two blocks away) these fine specimens priced very reasonably. The fish look good, break up the sea, give La Sirena something to reach out to, AND meant I didn’t need so much tile!
This is a little artistic inspiration that nobody is ever going to notice except me. I had a few dozen tiles with bubble patterns in them, and I decided to let these come from her mouth and up to the top edge. It was fun doing that, and I’m glad they are there. But the pattern is so subtle that I have to point it out from up close. (So, this is your and my little secret.)
On that same page, a very good idea for laying out more of the “top row” tiles. Going up and down that little stepstool got exhausting; easily 100 times a day. But I realized that for the top row, I could just lay tiles on a single row on the table, and then cement and out them all up at once. No blue tape (which there was nothing to stick to up there anyway). Worked!
There were HOURS spent scraping excess cement out from between the tiles. This picking tool was priceless. Radio Shack throws this in with their $11.00 soldering iron set; I don’t know another way to get one. I used both ends–the little flat angled one and the pointy one–both to very good effect. It lasted all the way until last week then finally snapped. I ground down a small screwdriver for the last few days.
An existential crisis here. I asked myself “Is there so much color up there that Sirena is getting lost?” I was getting a lot of green tile that wasn’t the boring 1950’s bathroom stuff; this was brighter colors which I had to spread out. Trying to make things consciously look random is a real challenge! I think it came out OK in the end.
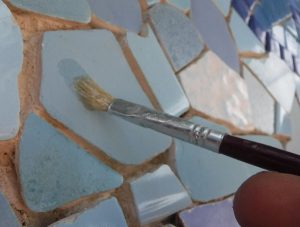
I found what I hope is a very good sealer for the tiles. Barniz (varnish) from Bexel is made to work on all porous surfaces including ceramic. I brushed that on any tile that did not look like it still has its glaze; I had no trouble at all getting the excess grout off afterwards.
I was very disappointed in the grouting float that I bought from Home Depot. Tiny bits of the black rubber came off in the grout; although you have to look hard to see them, I really expected better.
Funny thing is, every Mexican construction guy I talked to said the same thing: to use a Sandala de Playa! That is, a flip-flop. The rubber base of these is exactly the right thing, and you can probably find one that’s the same color as your grout. I’m serious. EVERY professional tile guy down here grouts with these things.
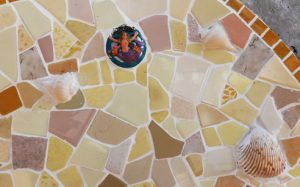
The other thing on this page is the problem with the shells. I should not have glued these to the concrete wall, the ended up way deeper than the top of the tiles and would be completely buried by the grout. SOLVED easily enough: since shells are unlimited and costless here at the beach, I found some of the same size and just glued them over the tops of each one.
The grouting bag was a problem too. It is way too big for this kind of detail work, and the whole is also too big. Solved by cutting it down, and shoving a grommet in the hole. There is a much better solution on the Mosaic Art Supply site using an actual cake decorators nozzle.
Going to their site for help after my first difficulties with the bag brought me one more no-brainer idea for this page: Go look for help FIRST!
Which is what I hope you did coming to this page. And now that you’re all versed on what can go right and wrong, Go forth and TILE!
–Dave
5 July, 2018


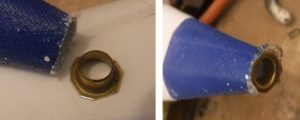 I looked around for a way to make the hole smaller, and came up with a brass grommet. Glued it in with hot glue and crossed my fingers that it wouldn’t be pushed out by the grout.
 So that’s it! By far the biggest art project I’ve ever done; one of the biggest projects of ANY kind, in fact.
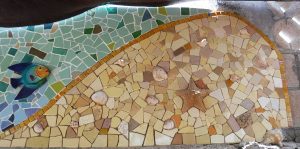 After the scraping and cleaning (I use the scrubby side of a ScotchBrite pad), I brushed the varnish onto the unglazed tiles. SO here is how the seafloor looks as of 2:00 PM today, all ready for grouting!
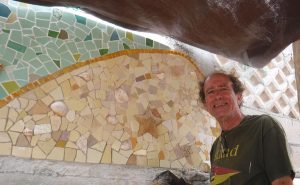 At about 1:30 this afternoon, I put up the very last tile in this project. Sp took this photo to mark the occasion.
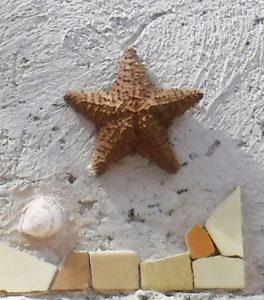 First task was to decide how to END this thing! Up until this week I had the far end of the sea floor marked with a couple of vertical-straight-edge tiles (photo), but that just would not look good when we decide what to do with the ugly cinderblock wall to the right.
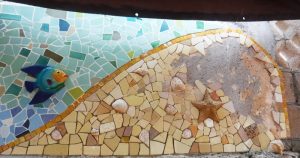

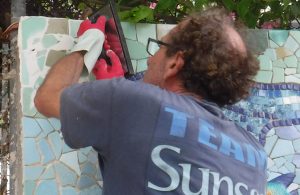 Here’s how I started. After mixing maybe 1/3 of the 5kg bag; I’m using the float to spread the grout over the tile, pressing it into the cracks.
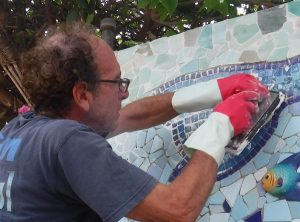 But the good (great, really) news is that instead of the grout bringing out all my irregularities in thickness and spacing between the tiles, it ended up masking nearly all of them! Even the glass tiles, many of which have no gap between them at all,ended up with a very nice white grout line around them.
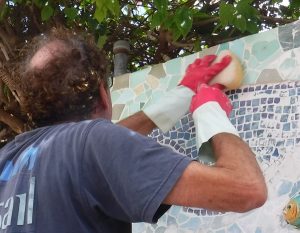
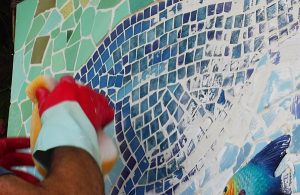

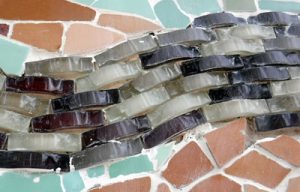
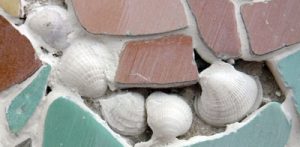 and the seashell bracelets and necklace have their own issues. They are buried way to deep for me to grout around them. I think the best thing to do, since I have an unlimited supply of shells, is to just glue a near-identical shell right to the top of each one. That should bring them up to the level of the tiles, and then I can grout around them.
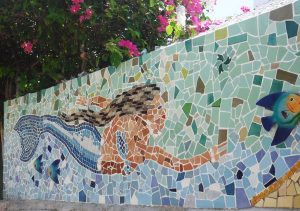 SO, Wow… this grouting day went spectularly well; far better than I ever thought it would. I can finally say: she looks GREAT. Here’s one more look, from the right end of the wall:
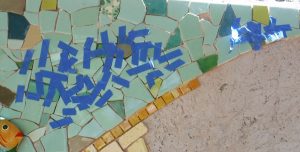 TASK 1: Finish fitting and taping up tiles. This was a really long process as I’ve typed before, with many tiles taking 15-20 minutes to fit. But I got it done before lunch, and here’s the photo.
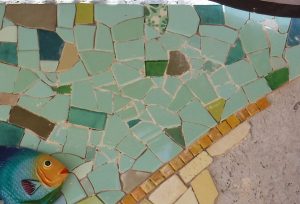 TASK 2: Cement them in. I’m back to the Bexel “Solucion Total” cement, and I’ve decided I really don’t like it as much. But I got them up in good shape (assuming they STAY up).
 Well, I thought so anyway. Because when I stepped back, I realized there were still a few little gaps to be filled; irregular-shape places that I figured I’d wait until the right tile showed up. They never did, so another half hour of cut-and grind to do these (under her hair)…
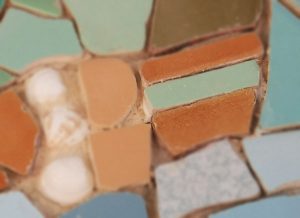 and this green one (between her fingers).